Breadboard: Complete Guide, Types, Uses, and Buying Tips
Discover everything about breadboards in this comprehensive guide, including their types, features, and practical uses for electronics projects. Learn how breadboards work, tips for choosing the right one, and common mistakes to avoid. Whether you are a beginner or a hobbyist, this detailed resource will help you understand breadboards better and make the right buying decision.
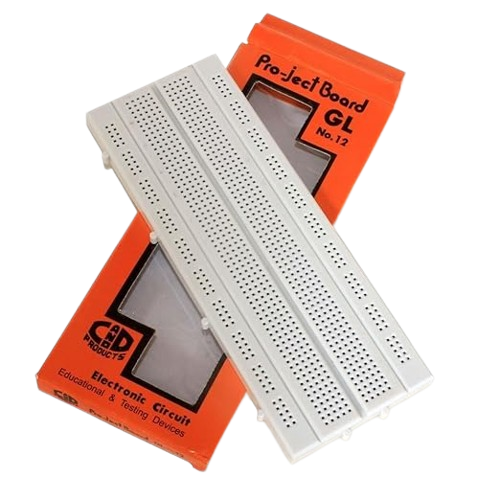
Device Overview
Introduction
If you’re learning electronics or working on small projects, one of the first tools you’ll come across is a breadboard. A breadboard is a reusable platform that helps you build and test circuits without soldering. It’s simple, affordable, and a must-have for beginners, students, hobbyists, and even professional engineers. In this complete guide, we will cover what a breadboard is, how it works, its different types, advantages, limitations, and even walk you through a simple example project. By the end, you’ll know exactly how to choose the right breadboard and use it effectively.What is a Breadboard?
A breadboard is a plastic board with many small holes where you can insert electronic components and wires. Inside the board, there are metal strips that connect certain holes together, allowing electricity to flow without the need for soldering. The name “breadboard” comes from a time when people built circuits on actual wooden boards used for cutting bread. Today’s breadboards are designed specifically for electronics and are much more convenient and reusable.Why Use a Breadboard?
Breadboards are popular because they make building and testing circuits quick and easy. You don’t have to solder wires permanently, which means you can make changes, fix mistakes, or try new designs without starting from scratch. This saves both time and money.Key Features of a Breadboard
-
No Soldering Required – Perfect for temporary circuits.
-
Reusable – Can be used over and over again for different projects.
-
Organized Layout – Holes are arranged in rows and columns for easy placement.
-
Expandable – You can connect multiple breadboards for bigger projects.
-
Affordable – Inexpensive and available almost everywhere.
Parts of a Breadboard
To use a breadboard effectively, it’s important to understand its basic structure:-
Terminal Strips – The main area for placing components. Each row of five holes is connected internally.
-
Bus Strips (Power Rails) – Long horizontal lines on the side for distributing positive (+) and negative (–) power.
-
Binding Posts – Some breadboards include posts for connecting an external power supply.
-
Adhesive Backing – A sticky layer at the back to mount the breadboard on a surface.
How Does a Breadboard Work?
A breadboard works because of the hidden metal strips underneath its surface. In the terminal area, each row of five holes is connected horizontally. In the power rails, the holes are connected vertically. This arrangement makes it easy to connect components and supply power to them.Types of Breadboards
There are several types of breadboards, and choosing the right one depends on your project:-
Full-Size Breadboard – About 830 tie points; good for large and complex circuits.
-
Half-Size Breadboard – Around 400 tie points; great for medium projects.
-
Mini Breadboard – Around 170 tie points; ideal for small circuits or portable use.
-
Solderless Breadboard – The most common type; allows reusing without soldering.
-
Self-Adhesive Breadboard – Can be fixed onto a surface for stability.
-
Breadboard with Power Supply Module – Comes with a built-in power supply, saving time.
Advantages of Using Breadboards
- Easy for beginners to learn electronics.
- Saves time during testing and prototyping.
- Reusable for multiple projects.
- No risk of damaging components with heat from soldering.
- Affordable and widely available.
Limitations of Breadboards
- Not suitable for very high-frequency circuits.
- Limited current capacity.
- Connections can become loose if used for a long time.
- Not ideal for permanent setups.
Example Project: Lighting an LED on a Breadboard
Let’s go through a very simple breadboard project.You Will Need:
- 1 Breadboard
- 1 LED
- 1 Resistor (220Ω)
- Jumper Wires
- 9V Battery with Clip
Steps:
- Place the LED on the breadboard (long leg in positive row, short leg in negative row).
- Connect one side of the resistor to the LED’s positive leg.
- Connect the other side of the resistor to the breadboard’s positive rail.
- Connect the LED’s short leg to the negative rail.
- Attach the battery’s positive wire to the positive rail and the negative wire to the negative rail.
- The LED should light up.
What You Learn:
This small project teaches how components are connected on a breadboard, how power is distributed, and how resistors protect components.
Tips for Choosing the Right Breadboard
-
Project Size – Bigger circuits need full-size breadboards.
-
Quality – Look for strong metal contacts to avoid loose connections.
-
Expandability – If you plan large projects, choose one that can connect to others.
-
Power Supply Support – Check if it can work with your voltage needs.
Breadboard Maintenance Tips
- Avoid forcing thick wires into the holes.
- Keep it clean and free of dust.
- Use good quality jumper wires.
- Store it in a dry place to prevent corrosion.
Conclusion
A breadboard is a must-have tool for anyone learning or working with electronics. It allows you to design, test, and modify circuits easily, without making permanent changes. Whether you are a beginner or an experienced builder, knowing how to use a breadboard can save you time, money, and effort. By understanding its structure, types, and proper usage, you can get the best out of this simple but powerful tool.Where to Buy
| Platform | Price | Action |
|---|---|---|
|
|
₹145 | Buy Now |
Prices may vary. Click on "Buy Now" to check current availability and pricing.
Administrator
Frequently Asked Questions
Common questions about Breadboard: Complete Guide, Types, Uses, and Buying Tips. Find answers to the most frequently asked questions.
User Reviews & Comments
Share your experience with this IoT device. Your feedback helps our community make informed decisions!
Share Your Experience
Help others by sharing your thoughts about this IoT device.
Related Devices
Explore more IoT devices in the same category
No Related Devices
Check out other categories for more IoT devices.
No Reviews Yet
Be the first to share your experience with this IoT device!